It lives, it dies!
Our new TrueNAS server is up, and all the hardware is working, but not without some hiccups on the way. After taking a lot longer to build than expect, I was so happy the other evening when I posted about the successful Power On Self Test (POST), and the new RAM (32GB) being properly detected. Exhausted at the end of the day I left the drives disconnected and the video card out.
The next day I’d planned on connecting the drives, installing TrueNAS, then maybe adding the video card. Things didn’t go as expected… The night before I’d moved the TrueNAS server in to another room. This move must have jostled things because the next day, after work, I powered on the system and … no video. I tried pulling the RAM and individually placing each stick in, swapping HDMI cables, trying different sources on the television, adding the video card, and resetting the BIOS, nothing helped. To make matters worse, while the motherboard had a speaker header, I had no PC speaker on me to plug into the motherboard for better diagnosis. I was gutted thinking that perhaps the wonderful Corsair 750W PSU had issues. Thankfully, this wasn’t the case. In a last stitch effort I reseated the AIO CPU water block, and voilà, the screen sparked to life!
Deciding to go lower power, a good choice.
In my previous posts I mentioned that the new ASUS Prime motherboard actually had an i7-7700K, a pretty awesome CPU for it’s time. But that CPU runs at 95W, and trying to think more forward, my wife and I not only want to simplify, we want to also try to save energy. While the i3-7100 cannot compare to the i7-700K for gaming performance, it seems (so far) like it’s more than capable of handling the load of transferring data to our NAS. With a TDP of 51W it’s going to use quite a bit less power than the 7700K would, and I haven’t seen it go much above 20% use transferring terabytes of data over.
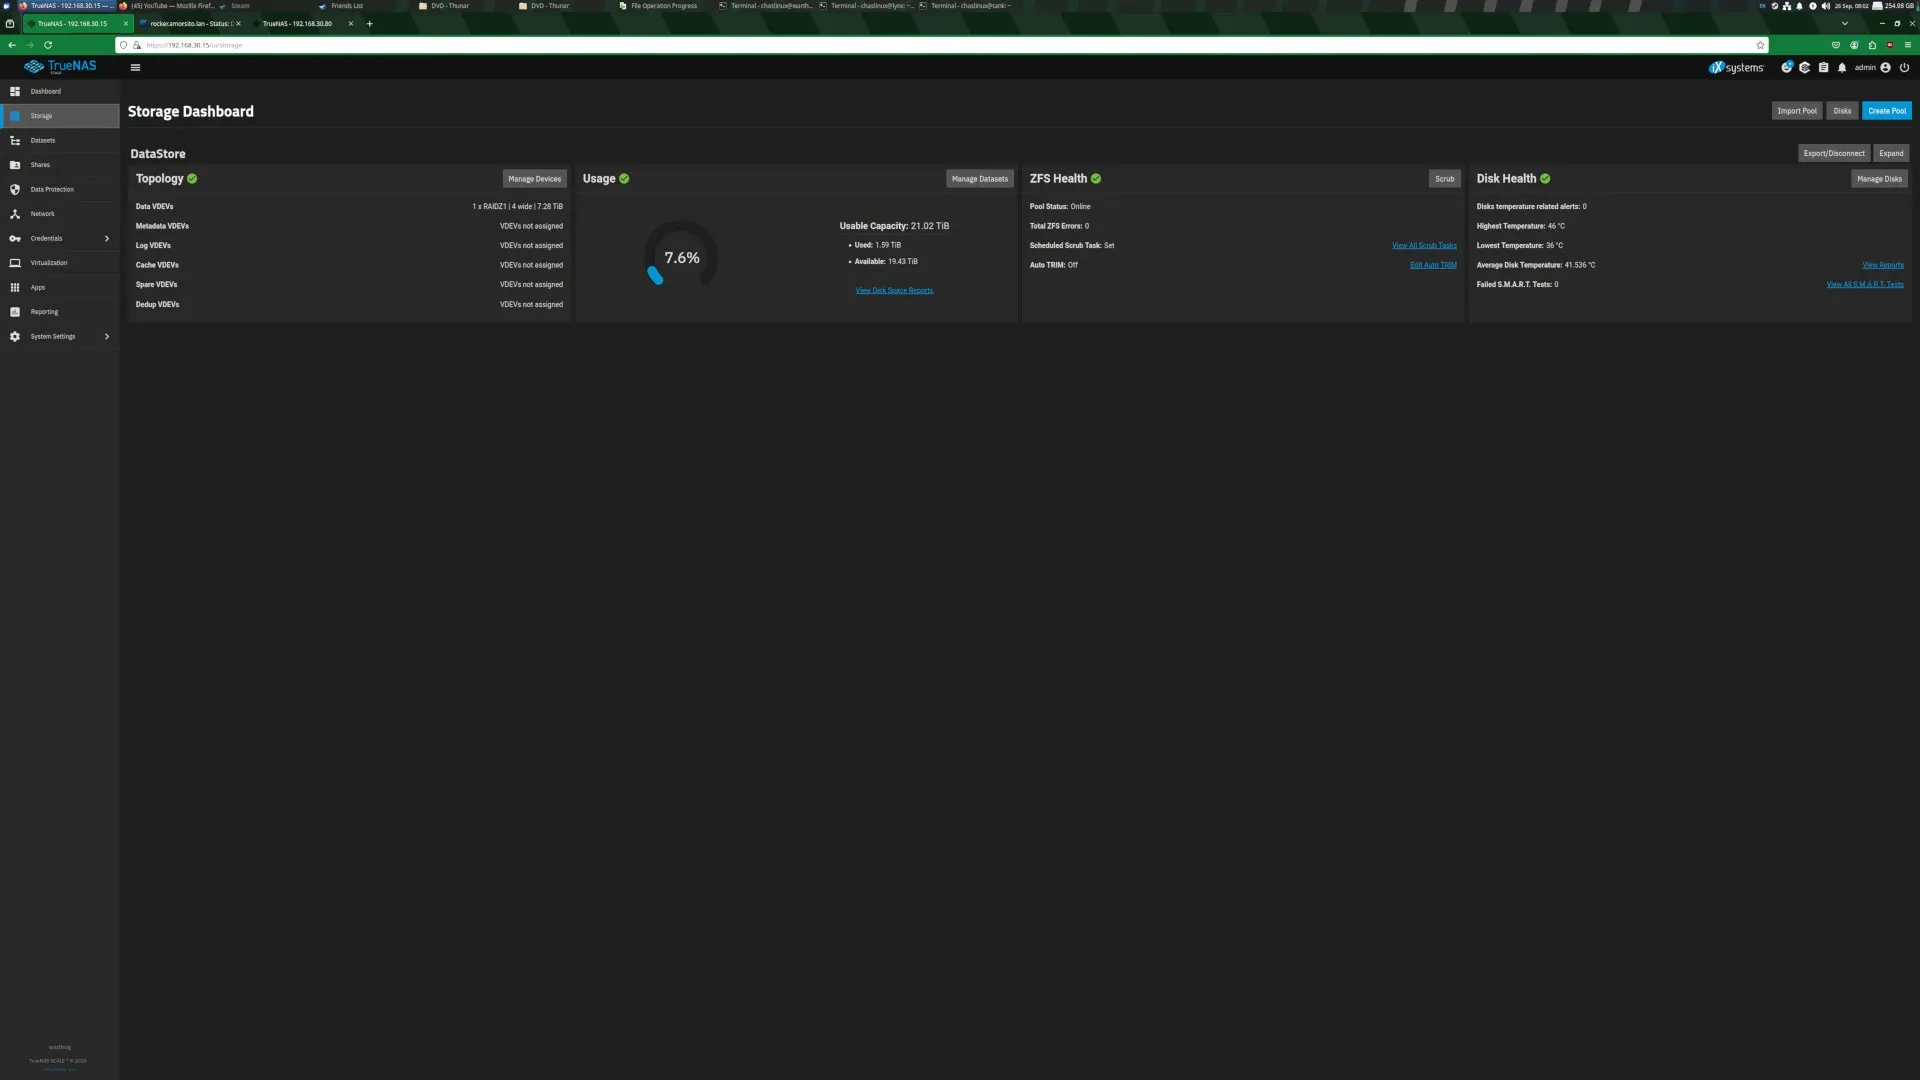 Fig 1. Creating the TrueNAS datasets
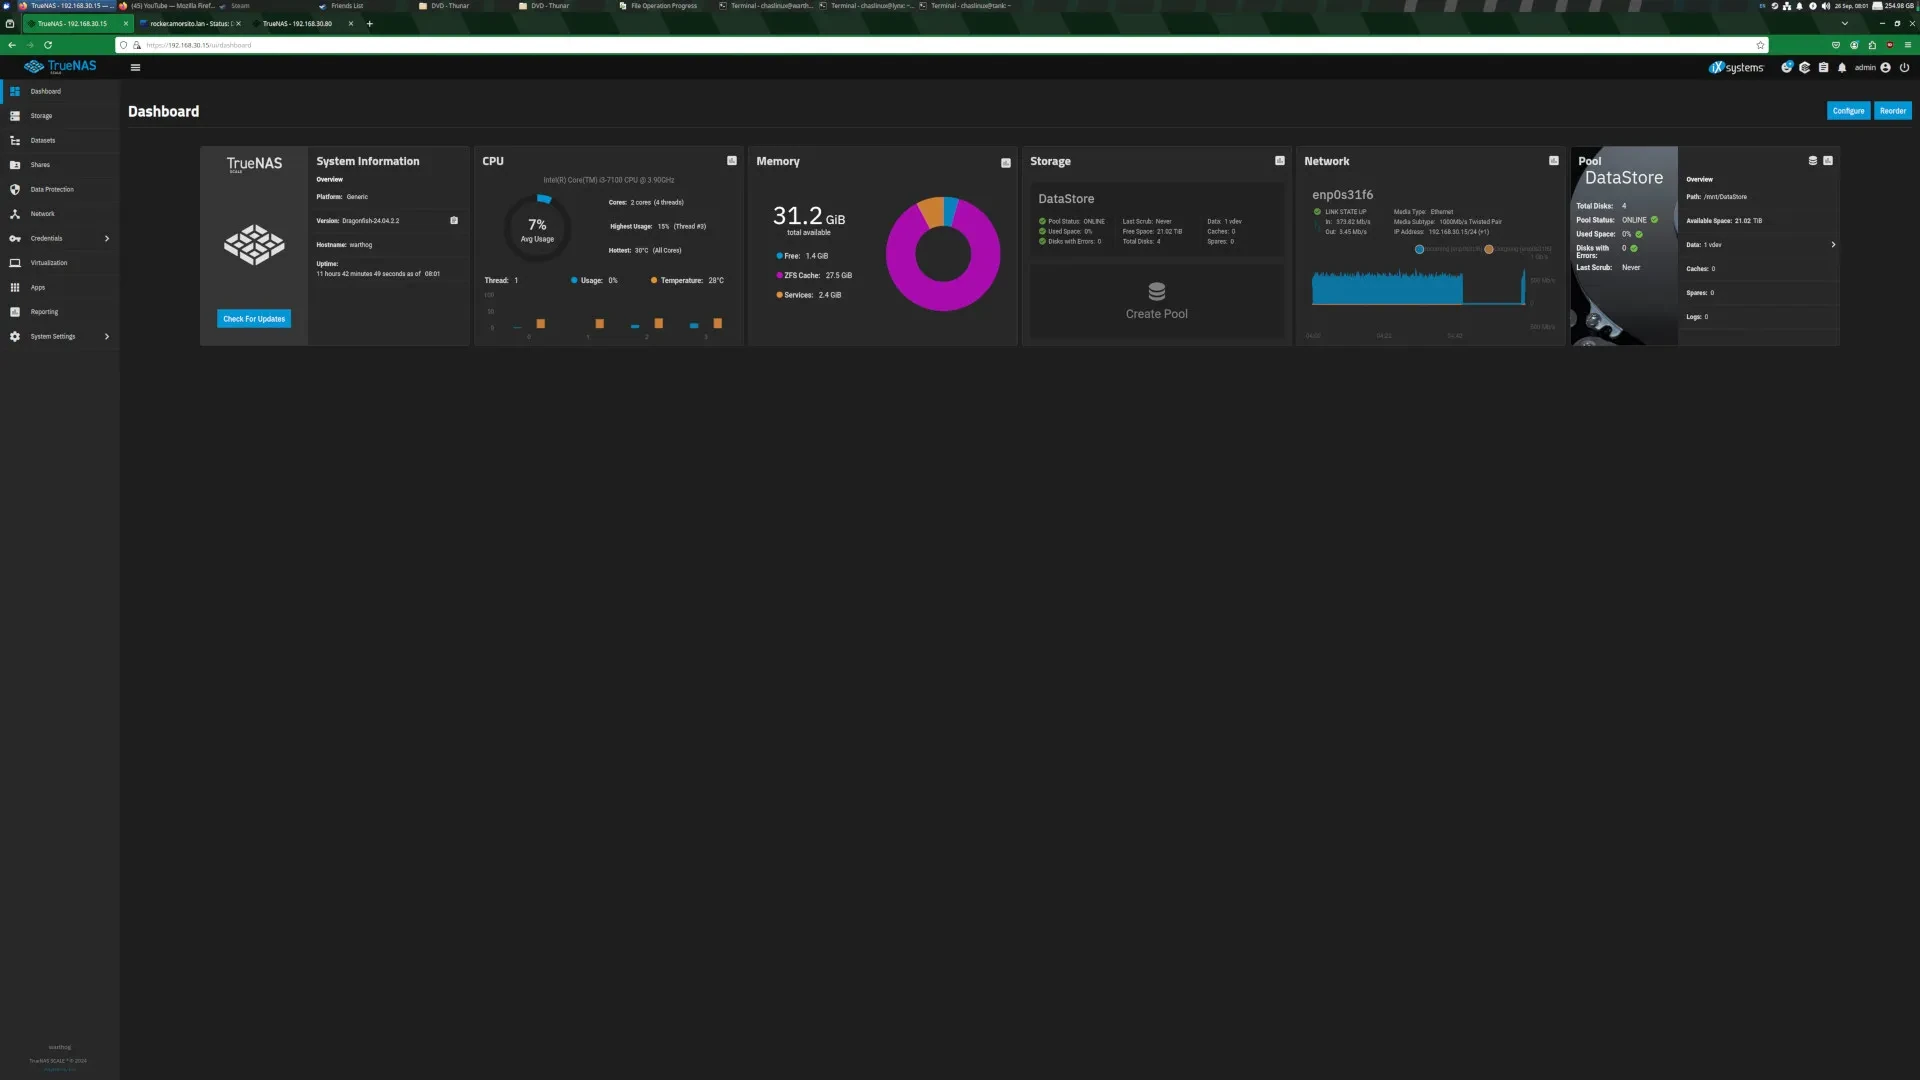
What did surprise me was the amount of RAM TrueNAS uses… all of it! Almost all 32GB of RAM is being used by TrueNAS, most of it for a ZFS (Zettabyte File System) cache. So far I’ve transferred around 7TB of data from our old media centre (via the backup Dell T110 TrueNAS).
Man in the middle, slow SMB?
I started transferring data via my desktop workstation. Sitting in front of my desktop I fired up Filezilla, and entered the settings for our temporary backup TrueNAS server, the Dell T110. In Filezilla I used SFTP to transfer data from the T110 to my workstation. I then entered the settings for the new custom TrueNAS server, and transferred files from my workstation to the new server. While I was getting transfer speeds of around 110 Mb/s, this man in the middle approach wasn’t really working because my desktop workstation has limited space (500GB), so I’d have to transfer small batches of data.
I set up SMB shares on both TrueNAS servers so I could drag and drop files between the two servers. File transfers slowed considerably, to around 55 Mb/s. I’m not sure if this is TrueNAS’s implementation of SMB, the fact that I was still using my workstation to do the drag and drop, or something else. Yesterday I looked to see if I could find something to do SFTP from one machine to another. Yes, I know I could use the terminal and sftp itself, and this is probably what I should have done, but I wanted to see if I could do it graphically (if I need to show someone else, I want to make it as simple as possible). I found a useful, but ill-named tool: gigolo. Gigolo lets you mount SFTP shares and graphically transfer between the two shares. I tried Gigolo at work, but found it has really terrible performance (around 15 Mb/s)transferring between 2 machines that are not the machine you’re currently on. I tried a few different computers, all with Gigabit LAN connections, on the same subnet, and close to one another. It’s convenient, but even the SMB performance was a lot better.
I’m not sure why my SMB performance is slow as I’ve seen reports of people getting 90 Mb/s+ via gigabit LAN. It will matter less after today as almost all the data on our old Dell TrueNAS (the backup for our media centre) will be copied over.
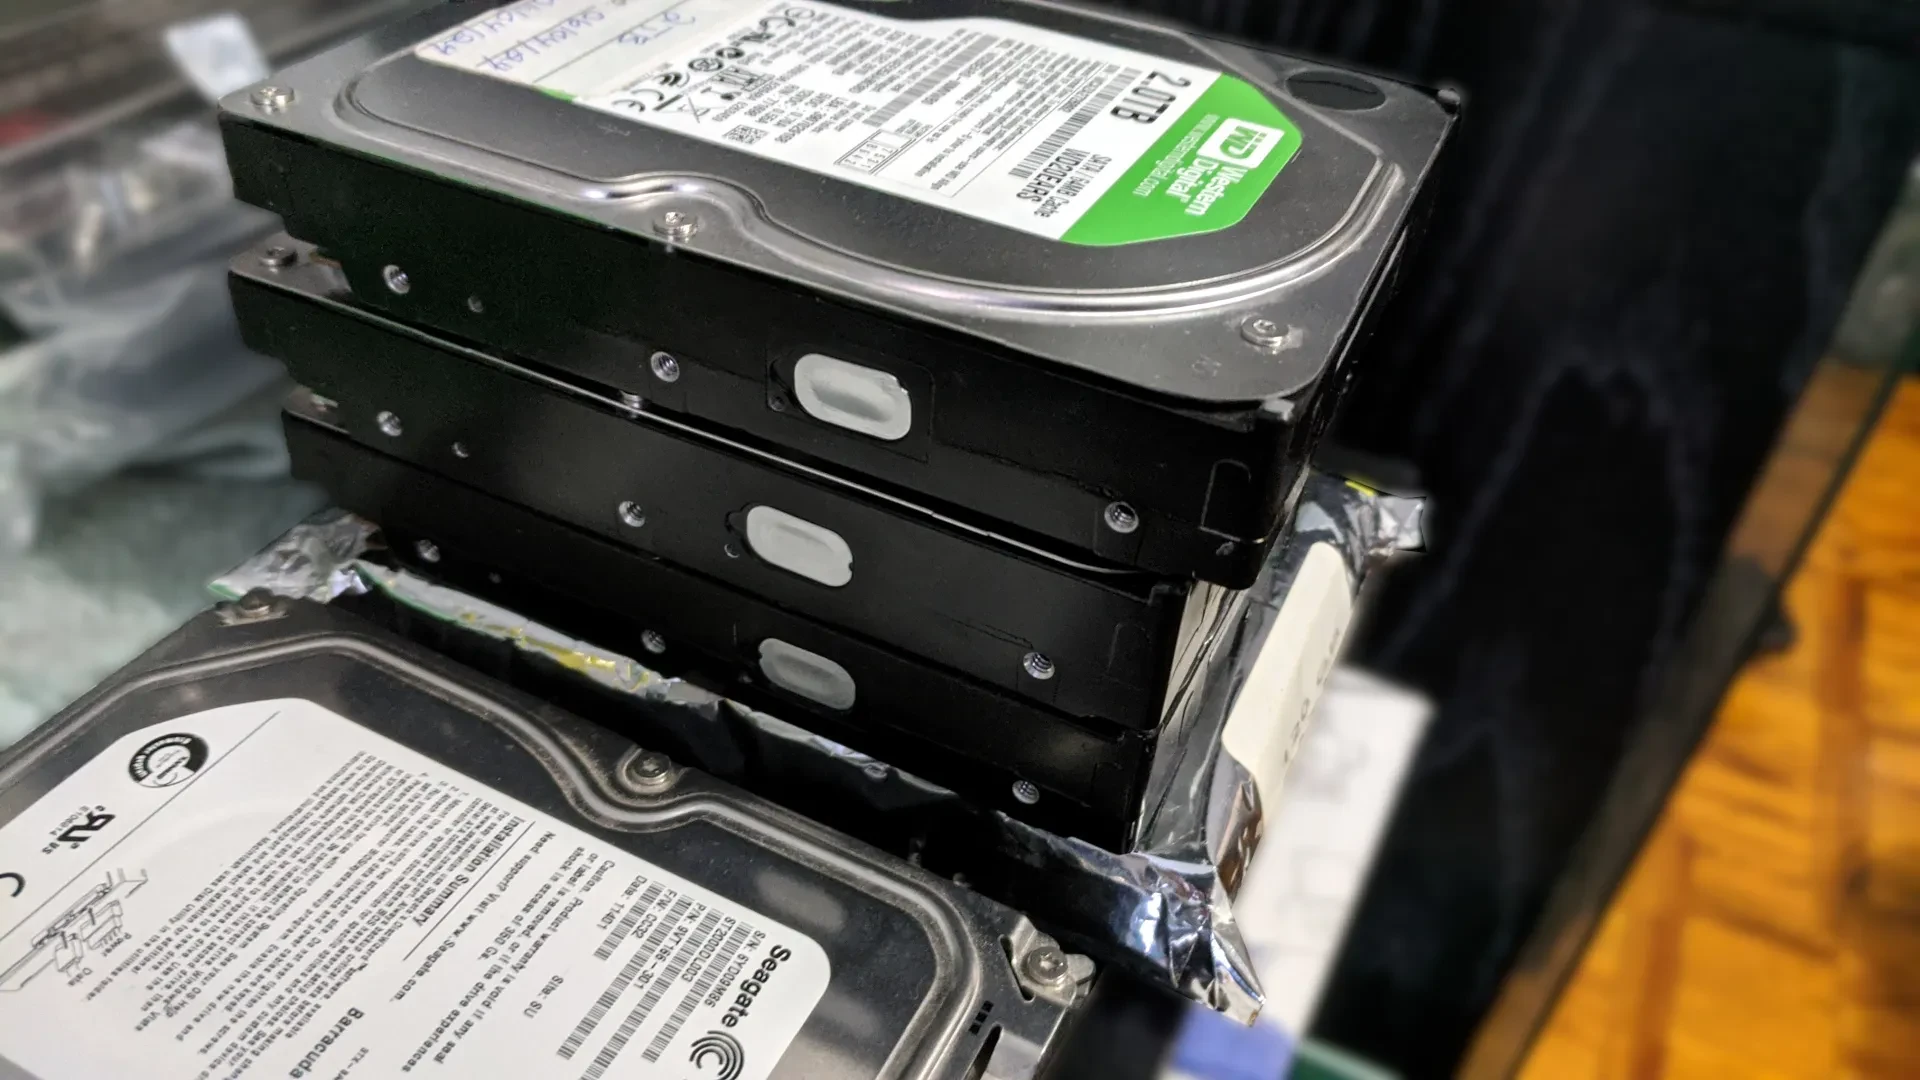 Fig 2. Mixed stack of backup drives from the backup Dell T110 NAS
The job isn’t done yet!
Back when I first noticed our KODI media centre was hovering around 93% disk space I started backing up new media to 3.5″ drives via a dock. This allowed me to shuck the cases and put the video discs in a binder that holds 250 discs. There is still probably 2-3 TB more data to copy over from these disks, but I can just connect those directly to the TrueNAS server and transfer over USB 3.0.
At some point I’m going to look at installing Jellyfin on the TrueNAS server, but I have a lot to learn about TrueNAS itself before doing this. I may end up using the GTX 970 graphics card for an older gaming build in the old Corsair Spec 02 case with that i7-7700K. That might make for a nicer old gaming machine for someone.
The NAS build is done for now, I probably won’t be writing much about it in the near future, but there may be an article or two if I discover something particularly interesting.
What’s next?
In terms of the NAS, building the NAS with a RAID-Z1 wasn’t ideal. While I do still have the Dell T110 as a backup server, it sits in storage - it’s backup only in the sense that I could use it to offload some data. But now that I have more than 20TB of potential storage on our main TrueNAS server I need larger drives for the backup server. I’m thinking to buy some inexpensive used NAS-grade drives from a reseller. After buying these I can port the data over to the backup server (because I’ve added a lot more data since), and add yet another Seagate 8TB IronWolf I’ve since picked up.